リジェクトされた
We discovered one or more bugs in your app when reviewed on iPad running iOS 10.0.1 on Wi-Fi connected to an IPv6 network.

Upon launch, app displays error messages.

In addition, tapping Shop tab results in displaying an error message.

We've attached screenshot(s) for your reference.

Next Steps

Please run your app on a device while connected to an IPv6 network (all apps must support IPv6) to identify the issue(s), then revise and resubmit your app for review.

If we misunderstood the intended behavior of your app, please reply to this message in Resolution Center to provide information on how these features were intended to work.

For new apps, uninstall all previous versions of your app from a device, then install and follow the steps to reproduce the issue(s). For updates, install the new version as an update to the previous version, then follow the steps to reproduce the issue(s).

Resources

For information about supporting IPv6 Networks, please refer to Supporting IPv6 DNS64/NAT64 Networks and About Networking

If you have difficulty reproducing a reported issue, please try testing the workflow described in Technical Q&A QA1764: How to reproduce bugs reported against App Store submissions.

If you have code-level questions after utilizing the above resources, you may wish to consult with Apple Developer Technical Support. When the DTS engineer follows up with you, please be ready to provide:
- complete details of your rejection issue(s)
- screenshots
- steps to reproduce the issue(s)
- symbolicated crash logs - if your issue results in a crash log
ドキュメントQiitaの記事接続するテストをする。
NAT64ネットワークを用意する必要がある。
MacをNAT64ネットワークにできるので、iPhoneでMacに接続することになる。
AirMac Stationにするということなので、macが接続する先のネットワークと、macに接続してくるネットワークと2経路持っておく必要がある。
Macからは優先LAN(Ethernet)でルータにつないでおき、WiFiはiPhoneから接続してくるようにするのが良い。
iPhone → WiFi → Mac → Ethernet → ルータ → (全世界へ)
というわけでMacは、10.11以降でLANケーブルを刺せるものが良い。
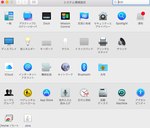
オプションキーを押しながら、「共有」をクリックし、そのまま「インターネット共有」を選択。
すると、「NAT64ネットワークを作成」チェックボックスが出現する。これを確認したらオプションキーを離す

「共有する接続経路」はEthernet(LANケーブルが刺せるmacでないと選択肢にそもそもない)
「相手のコンピュータでのポート」をWiFiにする。
WiFiオプション設定でネットワーク名やセキュリティ設定ができるが、しなくても良い
これでOK
PR

